Tutorial - Train your model on a cluster
Clusters Comparison
| Cluster | GPU | Login node | network | Cores | Stars |
|---|---|---|---|---|---|
| Beluga | 172* 4* V100SXM2 (16G) | beluga.alliancecan.ca | :x: | 40 | :star::star: |
| Cedar | 4* P100 (12G) 4P100 (16G) 4V100 Volta (32G) | cedar.alliancecan.ca | :heavy_check_mark: | 24 24 32 | :star::star::star: |
| graham | 2P100(12G) 6V100Volta(16G) 8V100(32G) 4T4(16G) 4T4(16G) 8A100 4A100 4A5000 | graham.alliancecan.ca | :x: | 32 28 40 16 44 128 32 64 | :star::star::star: |
| Narval | 159* 4*A100SXM4 (40G) | narval.alliancecan.ca | :x: | 48 | :star::star::star: |
1 Connecting to the system
- Install WSL on windows
- SSH Connecting:
[name@server ~]$ ssh -Y username@narval.alliancecan.ca[name@server ~]$ ssh -Y username@graham.alliancecan.ca
2 Github code management
2.1 on local machine: generate ssh key:
ssh-keygen -t ed25519 -C "your_email@example.com"
2.2 on cluster (e.g., graham or narval)
ssh-keygen -t rsa -b 4096
eval `ssh-agent -s`
ssh-add ~/.ssh/id_rsa_gra
ssh -T git@github.com
2.3 add new ssh keys (local machine and cluster)in the github
2.4 create repository and coding on local machine:
# first tiem
git clone git@github.com:***.git
# after make changes
git add *
git commit
git push
2.5 on cluster clone code and pull changes
mkdir code
cd code
# the first time
git clone
# after make changes in local machine
git pull
3 Confirm the filesystems
- when log into Alliance, in the ~ home directory
- set project folder:
$ vi .bashrcadd
export project=~/projects/def-pifolder/usernameto the last row of.bashrcto add a variable$project$ mv code $project $ cd $project $ ls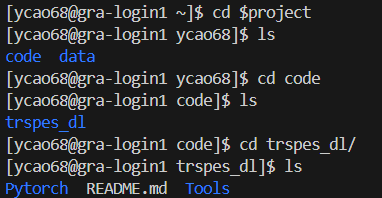
4 Transfer files
- Go to Globus portal, Settings -> Link Identity -> Your “existing organizational login” is your CCDB account. Ensure that Digital Research Alliance of Canada is selected in the drop-down box -> continue with your ccdb username -> continue -> allow
- upload files: file manager page -> collection -> typing a collection name ( computecanada#graham-globus, computecanada#cedar-globus…) -> authenticate
5 Setting the virtualenv in local machine
- create env:
$ sudo apt update && sudo apt upgrade -y $ pip3 install virtualenv $ virtualenv -p /usr/bin/python3 venv - install packages ``` pip3 install torch torchvision torchaudio scikit-learn tqdm pip install …
   - test with code

   - export env requirement
      `pip freeze --local > requirements.txt`

## 6 Setting the virtualenv in remote machine
$ module purge [name@server ~]$ module load python/3.10 scipy-stack [name@server ~]$ ENVDIR=/tmp/$RANDOM [name@server ~]$ virtualenv –no-download $ENVDIR [name@server ~]$ source $ENVDIR/bin/activate [name@server ~]$ pip install –no-index –upgrade pip [name@server ~]$ pip install –no-index requirements.txt [name@server ~]$ deactivate [name@server ~]$ rm -rf $ENVDIR
## 7 runing a job!

> using **git** to download code, specifically:
cd $SLURM_TEMDIR mkdir work cd work git clone git@github.com:**.git cd ** mkdir -p data/output tar -xf $project/data/*.tar -C ./data/
pip install –no-index wandb
## 8 Test in interactive run first!
cd $project/project_folder git pull
module purge module load python/3.10 scipy-stack source ~/venv/bin/activate
$ salloc –time=1:0:0 –gpus=2 –mem-per-gpu=32G –ntasks=2
Set environment variables
export TORCH_NCCL_BLOCKING_WAIT=1 #Set this environment variable if you wish to use the NCCL backend for inter-GPU communication. export MASTER_ADDR=$(hostname) #Store the master node’s IP address in the MASTER_ADDR environment variable.
wandb offline python main_ddp.py ```
after finish:
wandb sync ./wandb/offline-run-*